반응형
OpenCV에서 Mask R-CNN을 사용하는 방법
Python 파일에서 모델이 OpenCV와 함께 작동하도록 하려면 로드할 파일의 올바른 경로를 입력하도록 주의하면서 cv2.dnn.readNetFromTensorflow 함수를 사용합니다.
# Loading Mask RCNN
net = cv2.dnn.readNetFromTensorflow("dnn/frozen_inference_graph_coco.pb",
                                    "dnn/mask_rcnn_inception_v2_coco_2018_01_28.pbtxt")
물체 감지(상자 그리기)
이미지를 모델이 읽을 수 있는 형식으로 변환해야 합니다.
# Detect objects
blob = cv2.dnn.blobFromImage(img, swapRB=True)
net.setInput(blob)
이미지 크기를 조정해야 하고 색상 형식을 변경해야 하며 그렇지 않으면 오류가 발생합니다.
모든 것을 네트워크에 넣었고 모델은 이미 작동하고 있습니다.
boxes, masks = net.forward(["detection_out_final", "detection_masks"])
detection_count = boxes.shape[2]
객체의 모든 좌표를 가지고 있으며 남은 것은 추출을 수행하는 것입니다. 배열이므로 간단한 for 루프 를 사용하고 발견된 총 개체 수를 제한합니다. detection_count
for i in range(detection_count):
box = boxes[0, 0, i]
class_id = box[1]
score = box[2]
if score < 0.5:
continue
# Get box Coordinates
x = int(box[3] * width)
y = int(box[4] * height)
x2 = int(box[5] * width)
y2 = int(box[6] * height)
roi = black_image[y: y2, x: x2]
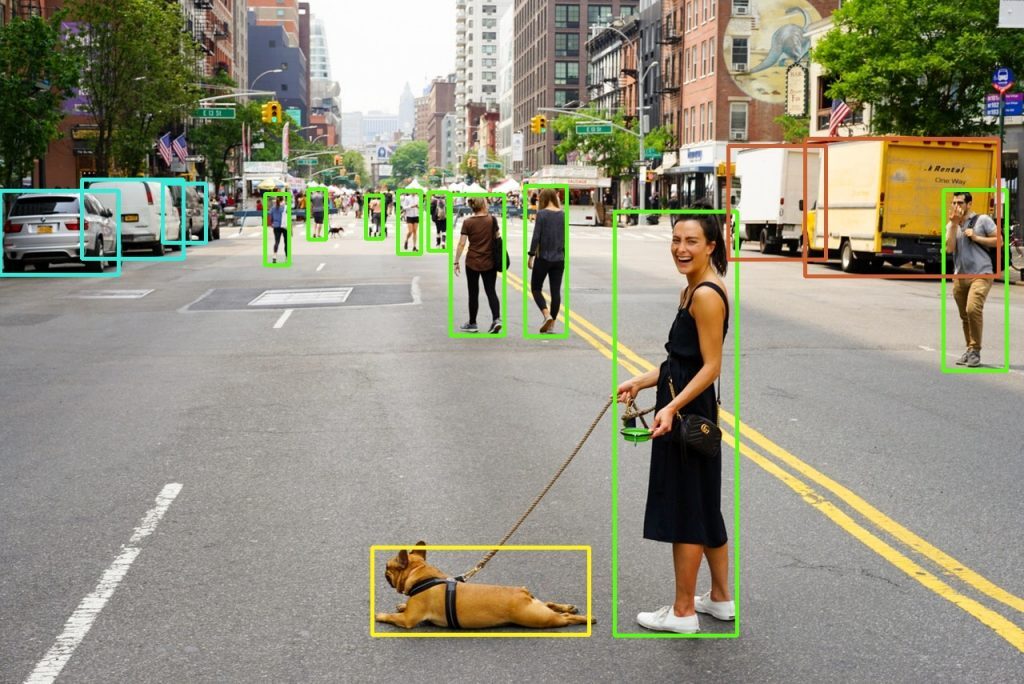
roi_height, roi_width, _ = roi.shape이미지에 적용된 박스 추출의 첫 번째 결과입니다.
물체 감지(마스크 벗기)
각 상자의 동일한 위치에는 개체와 완벽하게 겹치는 연결된 마스크가 있습니다. 모든 좌표 데이터가 추출되었으며 이제 배열에 포함됩니다.
첫 번째 단계는 마스크를 가져가는 것입니다.
    # Get the mask
    mask = masks[i, int(class_id)]
    mask = cv2.resize(mask, (roi_width, roi_height))
    _, mask = cv2.threshold(mask, 0.5, 255, cv2.THRESH_BINARY)

    cv2.rectangle(img, (x, y), (x2, y2), (255, 0, 0), 3)
이제 fillPoly() 함수로 좌표를 그려야 합니다.
    # Get mask coordinates
    contours, _ = cv2.findContours(np.array(mask, np.uint8), cv2.RETR_EXTERNAL, cv2.CHAIN_APPROX_SIMPLE)
    color = colors[int(class_id)]
    for cnt in contours:
        cv2.fillPoly(roi, [cnt], (int(color[0]), int(color[1]), int(color[2])))
이제 이러한 모든 작업을 이미지에 적용하려고 하면 아래와 같은 결과를 얻습니다. 너무 많은 정교함 없이 마스크 R-CNN을 사용하면 이 첫 번째 결과를 얻을 수 있습니다.

'영상처리 > 기초' 카테고리의 다른 글
| ResNet 리뷰 (10) | 2023.01.24 |
|---|---|
| Python slowfast설치 windows환경 (23) | 2023.01.20 |
| Face swapping-Swap faces(part 5) (6) | 2023.01.06 |
| Face swapping-Select and Warp triangles(part 4) (0) | 2023.01.06 |
| Face swapping-Matching the two faces triangulation(part 3) (0) | 2023.01.06 |